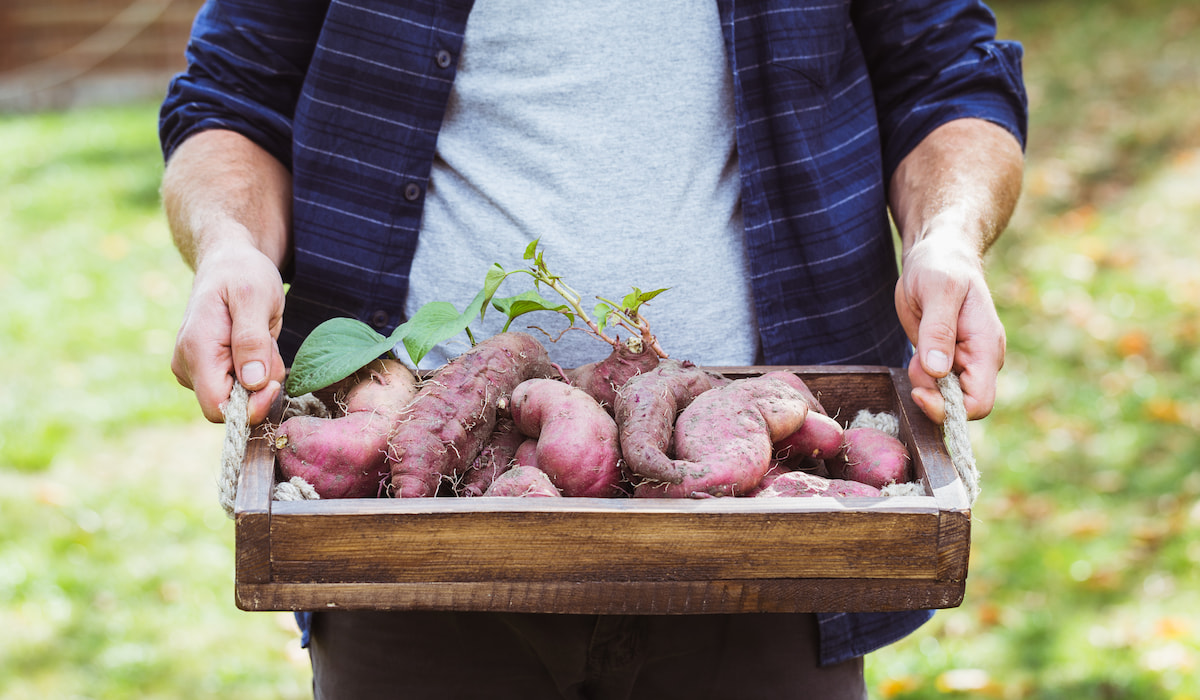
7 Ways to Sprout a Sweet Potato
If you love sweet potatoes, you can stay busy with them every part of the year. Even in the winter and early on in the spring, there’s plenty to do to get your crops ready so you have a supply of delicious sweet potatoes coming out of the ground as soon as possible.
One of the earliest things you’ll need to do is to sprout a sweet potato to get slips ready for planting. A slip is a green shoot that comes from a grown sweet potato that you then plant in the soil.
Some people buy slips online or at your local gardening store, but a lot of people like to harvest them off of mature sweet potatoes from a past harvest.
Sprouting a sweet potato isn’t particularly hard, but it takes some experience and an eye for what works. We’ve put together a list of seven ways you can sprout a sweet potato to increase your odds of a successful harvest!
Table of Contents
Choose a Small Sweet Potato for Slips
If slips are the way you want to go, then you should know what type of sweet potatoes will work best and produce the best slips.
Larger sweet potatoes that you pull out of your garden are best for eating. Those smaller ones, however, are ideal for making slips.
Look for small, thin sweet potatoes and set them aside for future slips.
You’ll Need About Four Weeks
Sprouting sweet potatoes takes a bit of time, so you’ll need some patience until you start seeing results. Typically, your sweet potatoes won’t sprout until around the 4-week mark.
To get them to sprout, you will need to make sure that the temperature and humidity are ideal.
If you’re living in a drier climate, you may need to store your sweet potatoes in a closed room with a humidifier going to get your room up to around 90% humidity. The temperature also needs to be around 80° F.
Avoid Sunlight
Sweet potatoes will sprout best when there is no sunlight. Ideally, you’ll keep your sweet potatoes in a box or paper bag and, with the temperature and humidity set, nature will do the rest.
Keep them in a closet, a shed, or a basement to avoid any sunlight from slowing the sprouting process. In a few weeks, you should begin to see the beginnings of sprouts forming on the sweet potato.
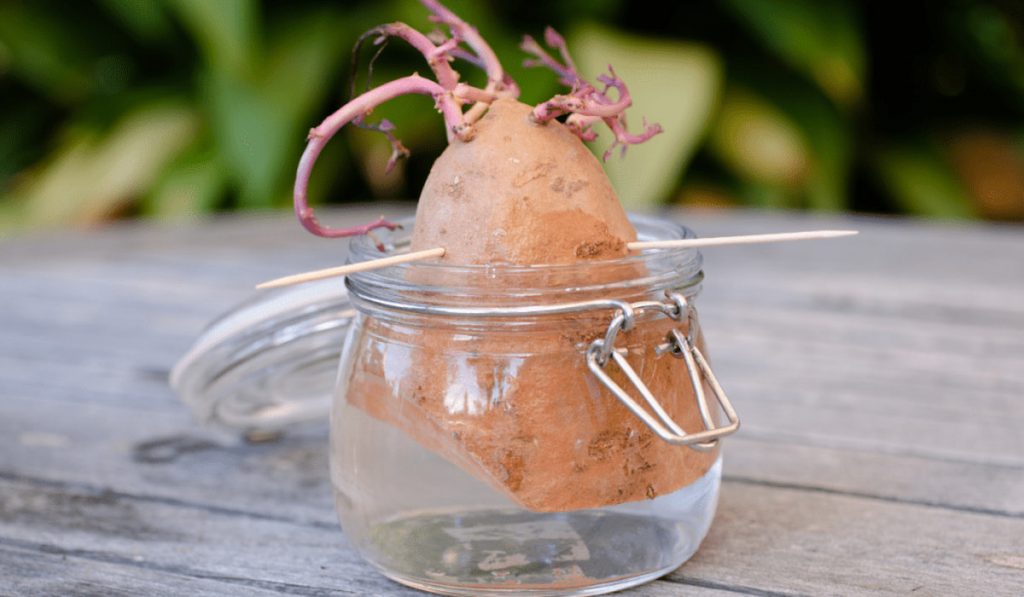
Using a Jar Filled with Water
Another way to get your sweet potato to sprout slips is to cut it in half and put it in a jar with water. You can use a recycled jar from your fridge.
Wash it out to make sure there is no jelly or whatever still inside that will affect the sprouting process. Fill it up to halfway with water. Then, put your cut sweet potato in the jar.
However, you’ll need to make sure that your sweet potato doesn’t go too far into the water. One way to do this is to stick toothpicks in the sweet potato that rests on the edge of the jar. It will stop your potato from falling all the way into the jar.
You can put the jar in a closet or on top of a radiator and wait for slips to start shooting up out of the sweet potato.
Bury Part of Your Sweet Potato in Soil
Another way to get your sweet potato to sprout is to keep it partially buried in the soil. You will want to keep the soil in a container inside rather than putting the potato out in your yard or the garden. The reason being is that sprouting often happens in the winter or early on in the spring, and outdoor temperatures aren’t ideal.
With the sweet potato inside, you can keep it warm and get it to sprout faster. You’ll want to mist the soil and potato often to keep humidity levels high.
First, you’ll notice that roots start going down into the soil, but then sprouts should start shooting up soon after that.

Avoid Sweet Potatoes with Damage Spots
The potato you choose to grow slips is often just as important as what you do to get it to sprout. You’ll need the smaller sweet potatoes because they sprout better, but also because you’ll want to eat the big ones you grow!
Another thing to avoid is any sort of damage spots or cracking in the sweet potatoes. To make sure you’re not trying to sprout a damaged sweet potato, give it a good wash before you start sprouting it. It will increase your chances of success.

Get the Sprouts to Grow
Getting your sweet potato to sprout isn’t too difficult, but starting to see green is only part of the sprouting process. For your sweet potato slips to be healthy enough to survive when they’re planted, they need to be strong and large enough.
Ideally, your sweet potato slips will be around four inches long before you touch them.
Once they are that long, you can gently remove them from the sweet potato and put the bottom of the slips in water. In just a few days, you’ll see significant growth in the roots of the sprouts, and then they will be ready for planting.
You can try these ways to sprout your sweet potatoes, and the best way to go about it is to try different things and stick with what gives you the best results. One of the great things about sweet potatoes is that they are still relatively inexpensive, so you can try a few different ways at once.
Try the water in a jar method and stick one in a plastic container with soil. Stuff a few in a warm, dark closet and let time do the rest of the work. Hopefully, soon you’ll have plenty of sweet potato slips on your hands ready to be planted in the spring for a great upcoming harvest!